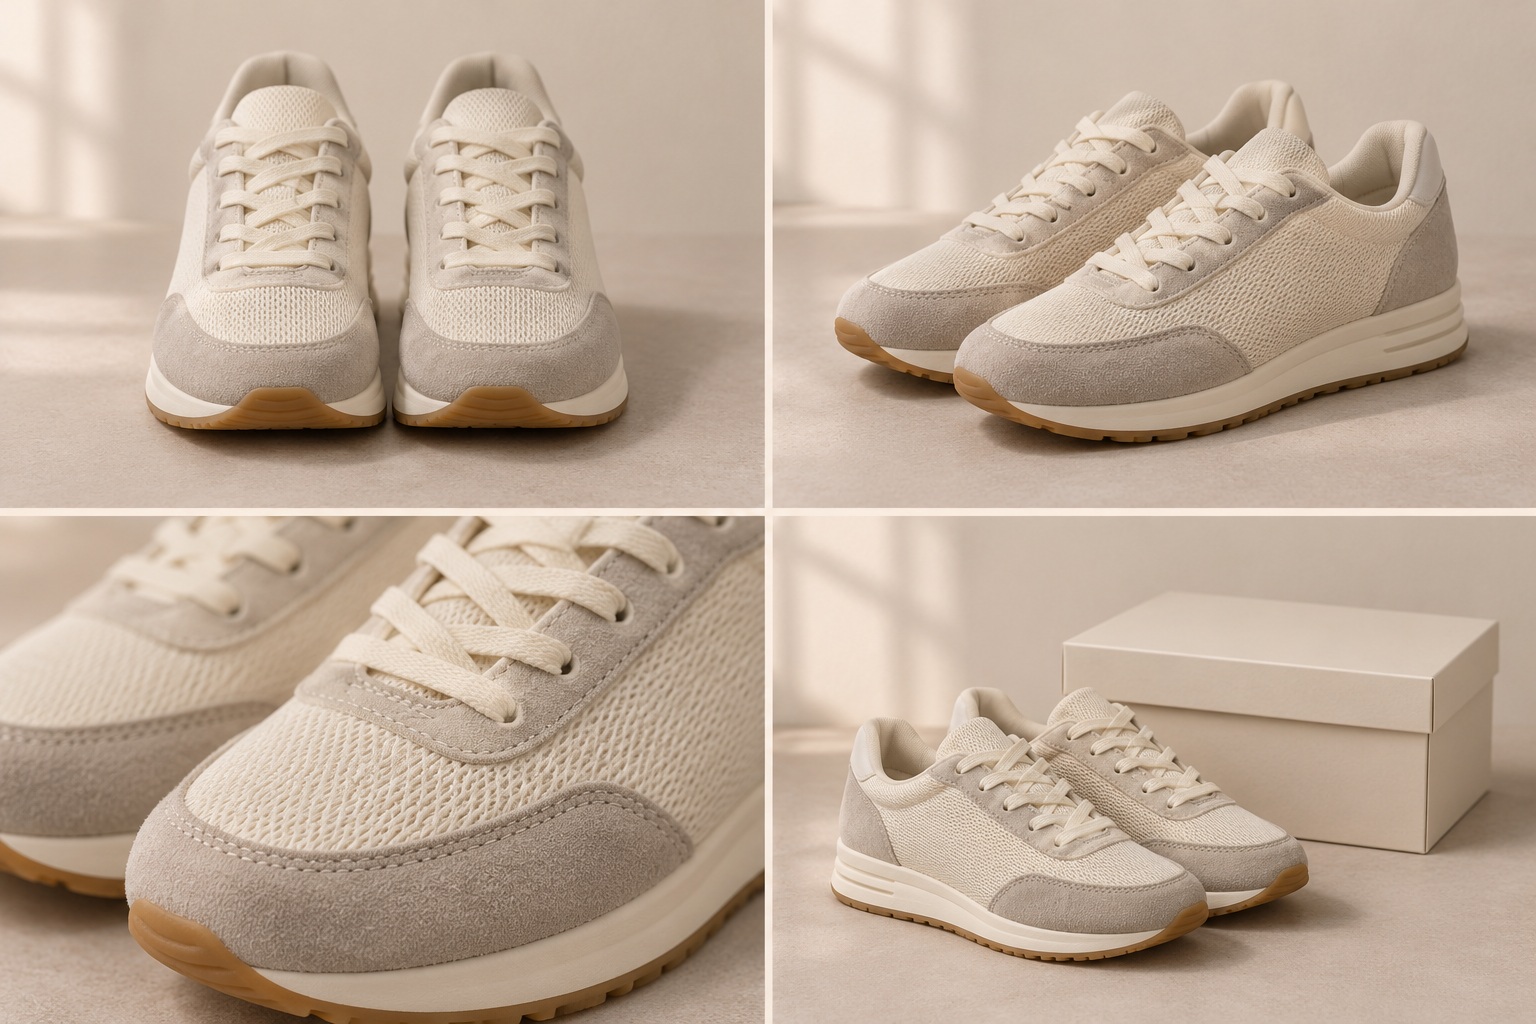
A Nano Banana lookbook works when the page feels like one shoot. Lock one sneaker SKU, then move from a clear front view to an angled frame and a close detail. Each image should reveal something new about the same pair. That SKU lookbook rhythm gives the reader a reason to keep looking, without making every frame compete for attention.
Quick answer: Build around one sneaker SKU and a short frame ladder: front view → three-quarter view → detail. Keep the product reference and lighting steady, change one prop or set element at a time, and save the approved sequence as a reusable shot list. Check the shoe construction in every selected frame; a coherent mood does not guarantee an accurate SKU.
Frame Ladder for One SKU
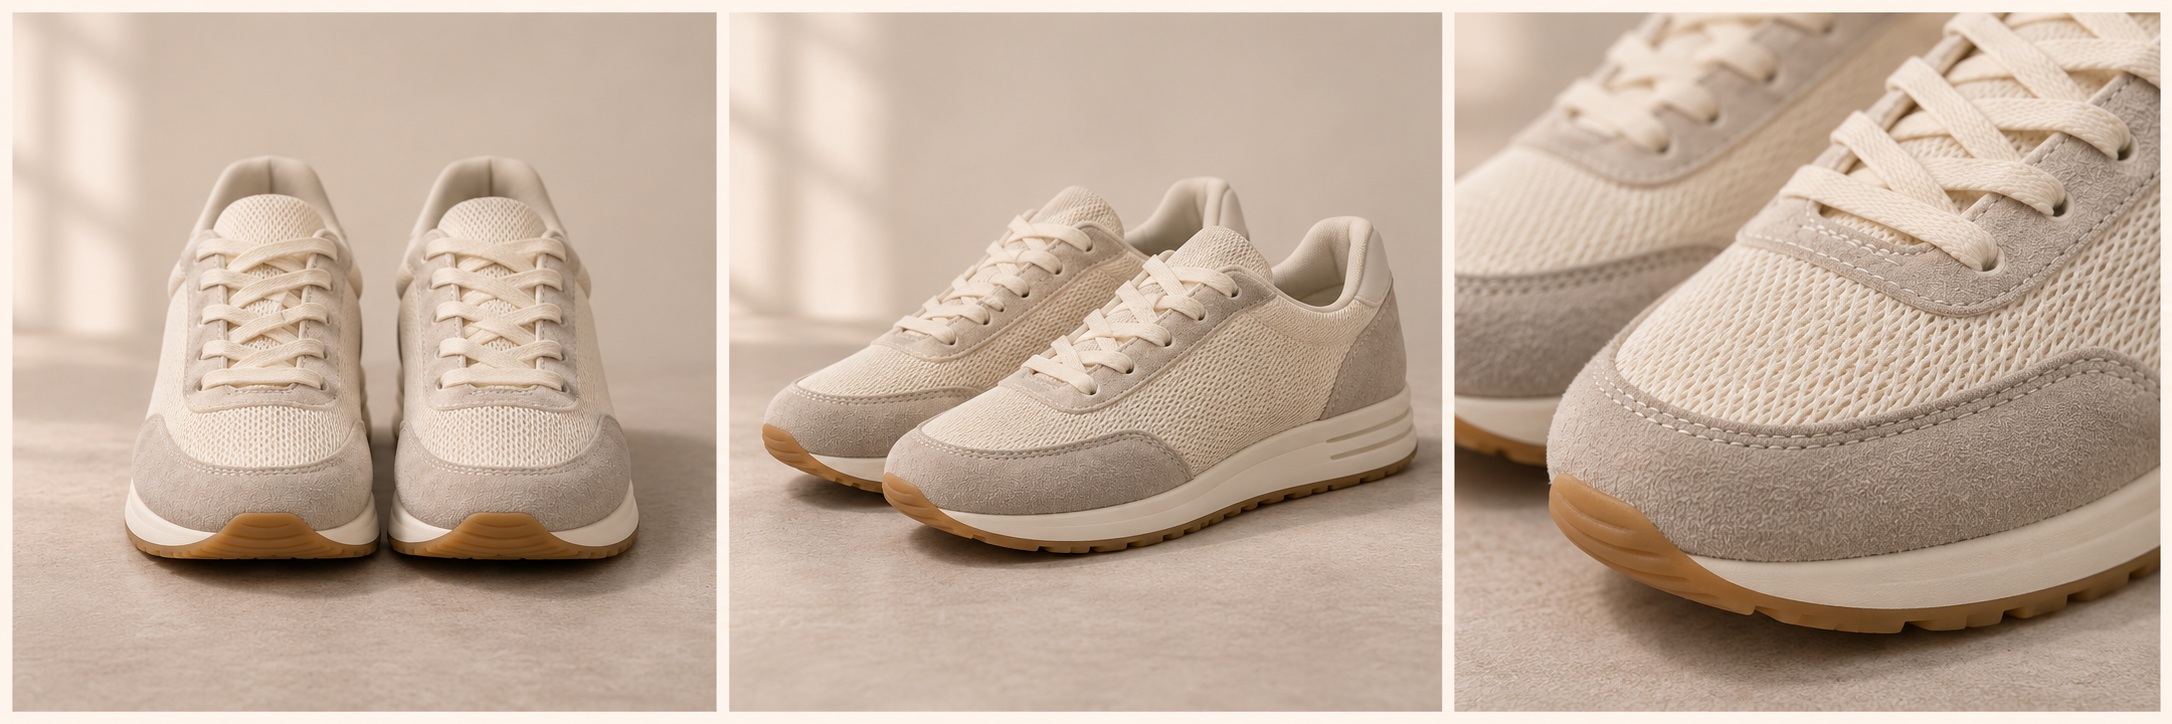
Start this Nano Banana lookbook with a single reference pair: ivory mesh running sneakers with stone-gray suede overlays, ivory laces, an off-white midsole and a thin honey-gum outsole. The reference defines the product. Keep its original photograph beside your working images so you can compare the toe shape, overlay edges, lace arrangement and sole profile. The illustrations here demonstrate the sequence; they are AI-generated editorial examples.
The opening frame introduces the whole pair. Place both shoes on a pale stone surface, toes facing the camera, with enough space between them to read each silhouette. Use a quiet cream background and soft light from the left. In the generator, start with a direct instruction: “Photograph this same sneaker pair from the front on pale stone. Keep the entire shoes in frame, with ivory mesh, gray suede overlays and gum outsole unchanged. Soft left-side window light, natural contact shadows.” Review the product before using that image as the opening beat.
Move to a three-quarter view for the second frame. Keep the same pair, surface, background and light; change the camera angle so the viewer can see the side panel and the depth of the sole. Ask for “the same setup, camera at a three-quarter angle, both shoes fully visible.” Compare the curved toe overlay and the heel thickness with the reference. If the angle reveals an invented panel or a different outsole, revise that frame before extending the set.
For the third frame, move closer to the toe and lacing. This is the first deliberate change in scale: the full-pair opening establishes the product, the angled view explains its shape, and the detail lets the reader inspect the materials. Keep enough of the shoe in the crop to make the detail recognizable. A close-up of anonymous fabric adds less than a frame that connects the mesh, suede edge and lace path.
Read the three frames together at the size they will appear on the page. The first should feel open, the second should add depth, and the third should slow the viewer down. If two images deliver the same information, keep the clearer one. Build this SKU lookbook rhythm (one product, many frames) through useful changes in distance and angle, while checking that the shoes remain the same product.
Change One Prop or Set at a Time
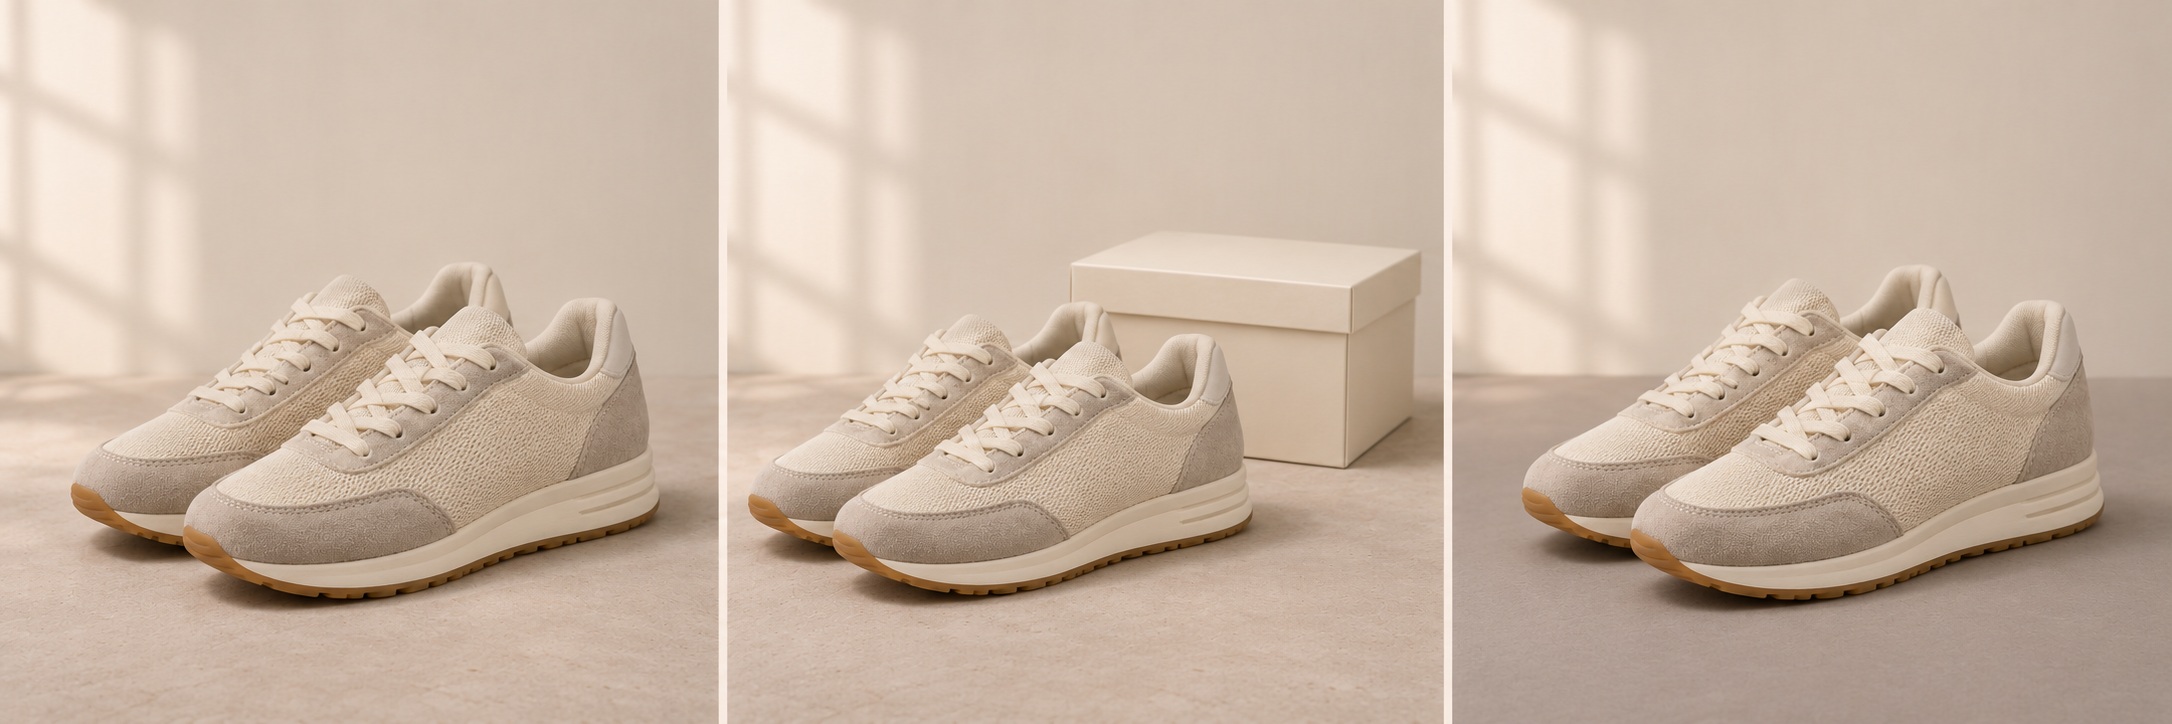
After the detail, return to a full-pair still life. Use the approved three-quarter composition as a product-only reset: the same shoes on the same pale stone, with no accessories. That clean frame gives you a baseline for the next change and gives the page breathing room after the close crop.
First, add one plain cream shoebox beside the pair. Hold the camera, shoe positions, floor and light steady. A useful instruction is “Keep the approved sneaker pair and composition unchanged; add one closed, unbranded cream shoebox behind the shoes, with the toe and sole edges unobstructed.” The box should support the scene without covering the product. Check that the addition has not changed the shoes' scale or introduced a printed logo.
For a surface variation, return to the clean reset rather than carrying the box forward. Replace only the pale stone floor with a warm gray paper sweep. Keep the cream background, the three-quarter angle and the left-side light. This makes the surface the single change you are judging. Look for a believable contact shadow under the outsole; a shoe that appears to float breaks the photographic feel even if its colors match.
Now compare the reset, box frame and paper-surface frame side by side. The mesh should remain ivory across all three, the suede should stay stone gray, and the gum edge should retain its thickness. A darker floor can make a shoe look lighter by contrast, so inspect the material as well as the overall mood. If one variation changes the construction, return to the product reference and revise it instead of compensating with more props.
Choose the variation that earns a place in the sequence. The shoebox can suggest a fresh pair ready to wear; the paper surface can provide a quieter texture change. You do not need to include every version. A short lookbook reads better when each image has a distinct job and the sneaker remains easy to inspect.
Shot List You Reuse on the Next SKU
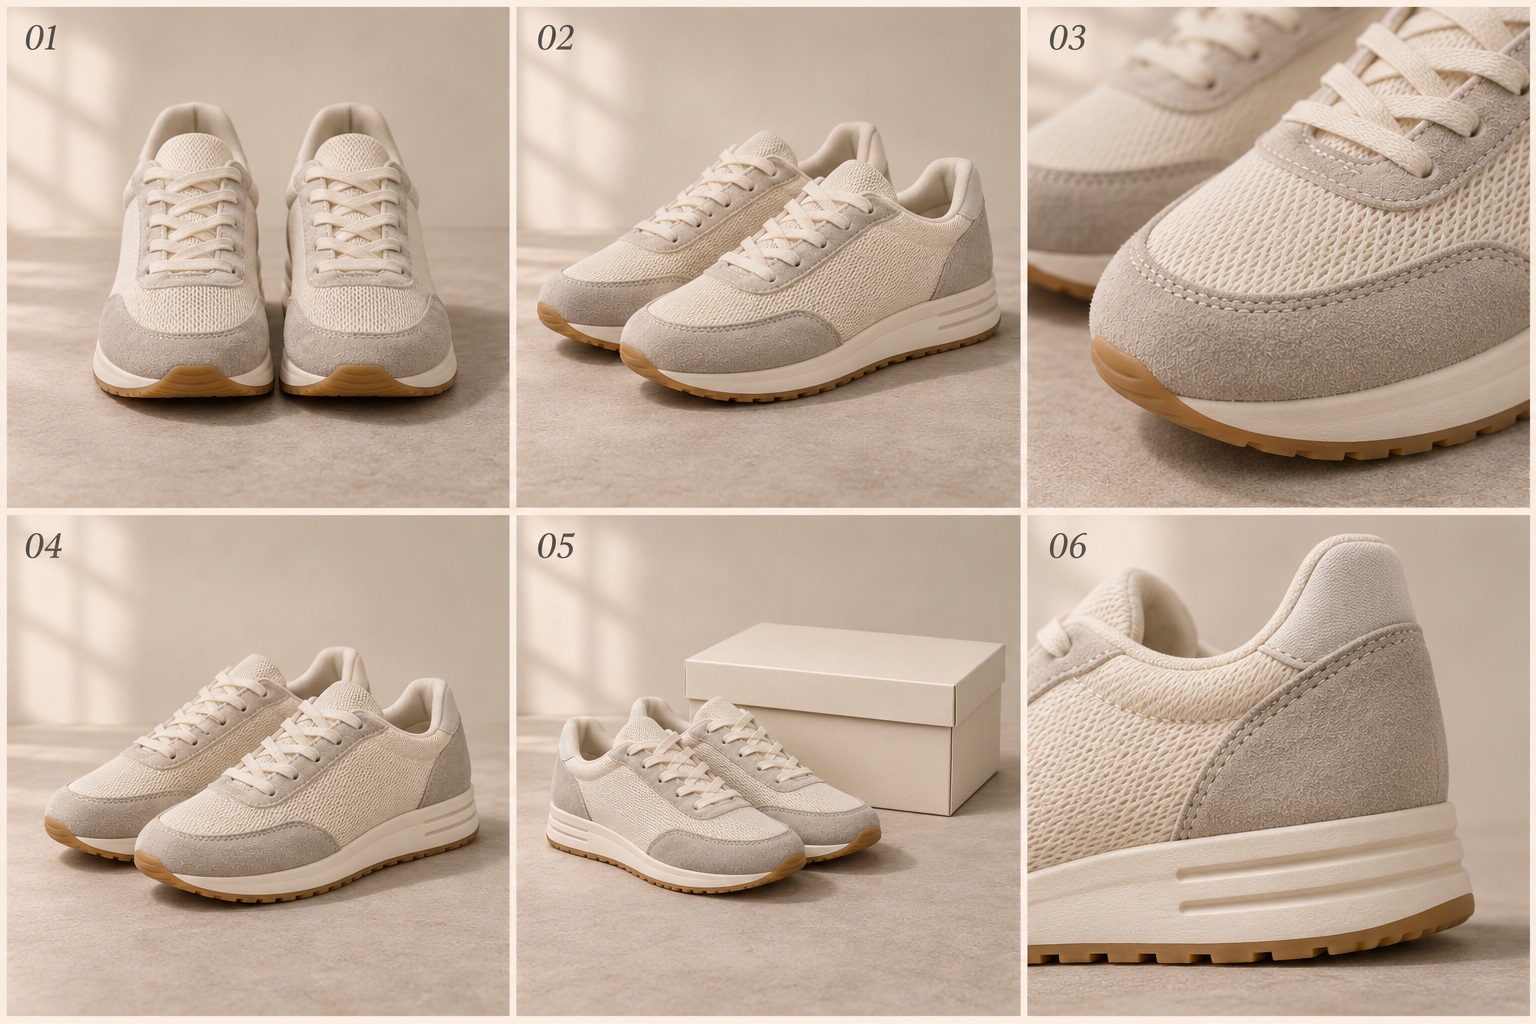
Save the sequence as a product shot list, with the purpose of each frame written beside its approved output. The order below extends the initial ladder into a six-frame page: introduce the pair, show its depth, inspect the upper, reset the view, vary the surroundings, then finish on a construction detail.
- 01 — Front introduction: show the complete pair, toes forward, on pale stone. Leave room around the shoes so the silhouette is clear.
- 02 — Three-quarter view: reveal the side panels and sole depth while keeping the pair, light and background steady.
- 03 — Upper detail: move in on the mesh toe, suede edge and lacing. Keep the crop connected to the recognizable shoe.
- 04 — Product-only reset: return to the complete pair in the clean three-quarter setup. Give the reader a pause after the close detail.
- 05 — One set variation: use the selected shoebox or surface change. Keep the shoe angle and construction easy to compare with the reset.
- 06 — Sole closer: finish at the heel and outsole edge, showing the midsole grooves and gum tread without inventing new parts.
For each selected image, record the product reference filename, camera angle, crop, light direction, surface, prop and final prompt. Add one short approval note, such as “selected because both toe outlines and the gray overlay edges match the reference.” Keep rejected versions separate and note the specific problem. A small record of decisions makes the next session easier to continue than a folder full of unexplained outputs.
When the next SKU arrives, reuse the order and the purpose of the frames, then replace the product reference and rewrite the construction details. A high-top may need a taller crop; a darker shoe may need more separation from the background. Build a fresh front frame for that product before continuing. Reusing the rhythm should save planning work while leaving room for the new shoe's proportions.
Review the finished page from top to bottom. The opening should establish one pair, the middle should vary distance and surroundings, and the last image should reward a closer look. Remove any frame that repeats its neighbor without adding information. Before using the set in a product listing, compare every visible feature with the real SKU photograph and replace inaccurate frames.